
 Pin it
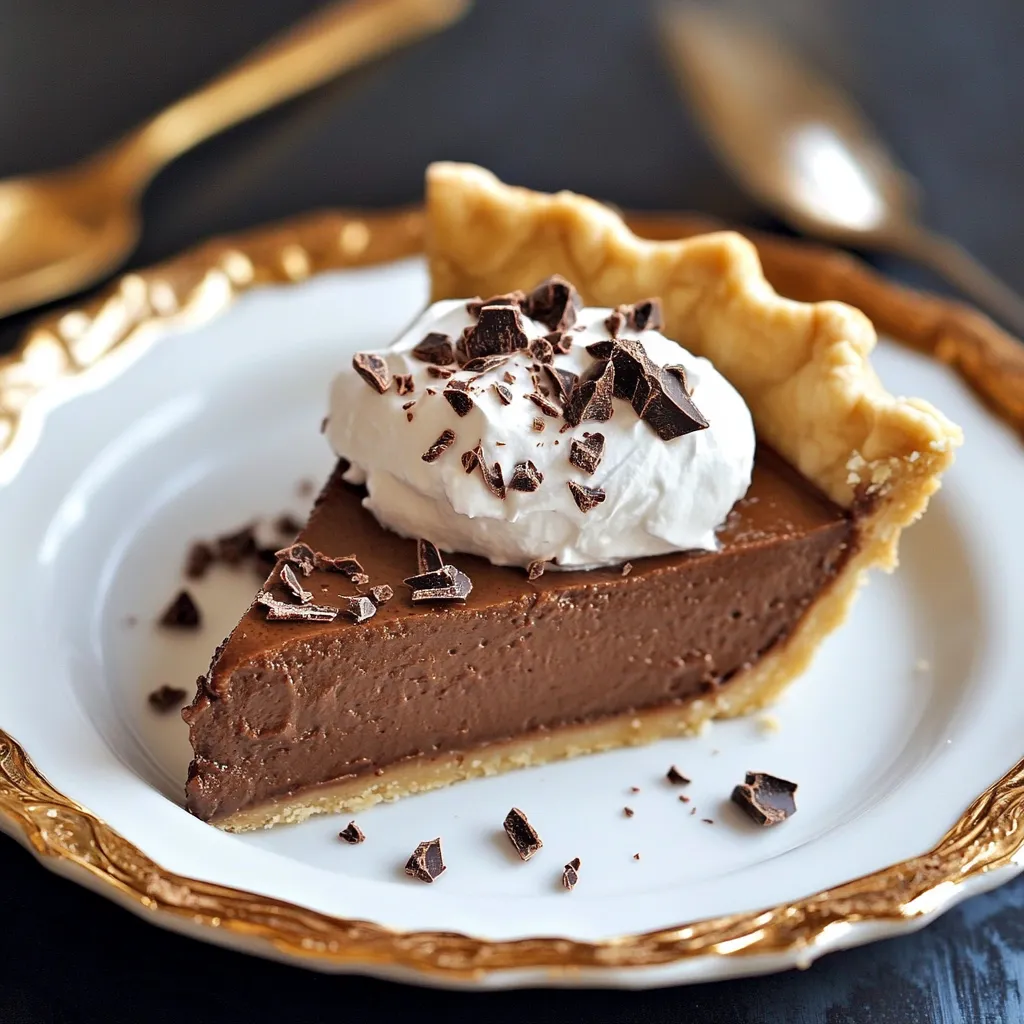
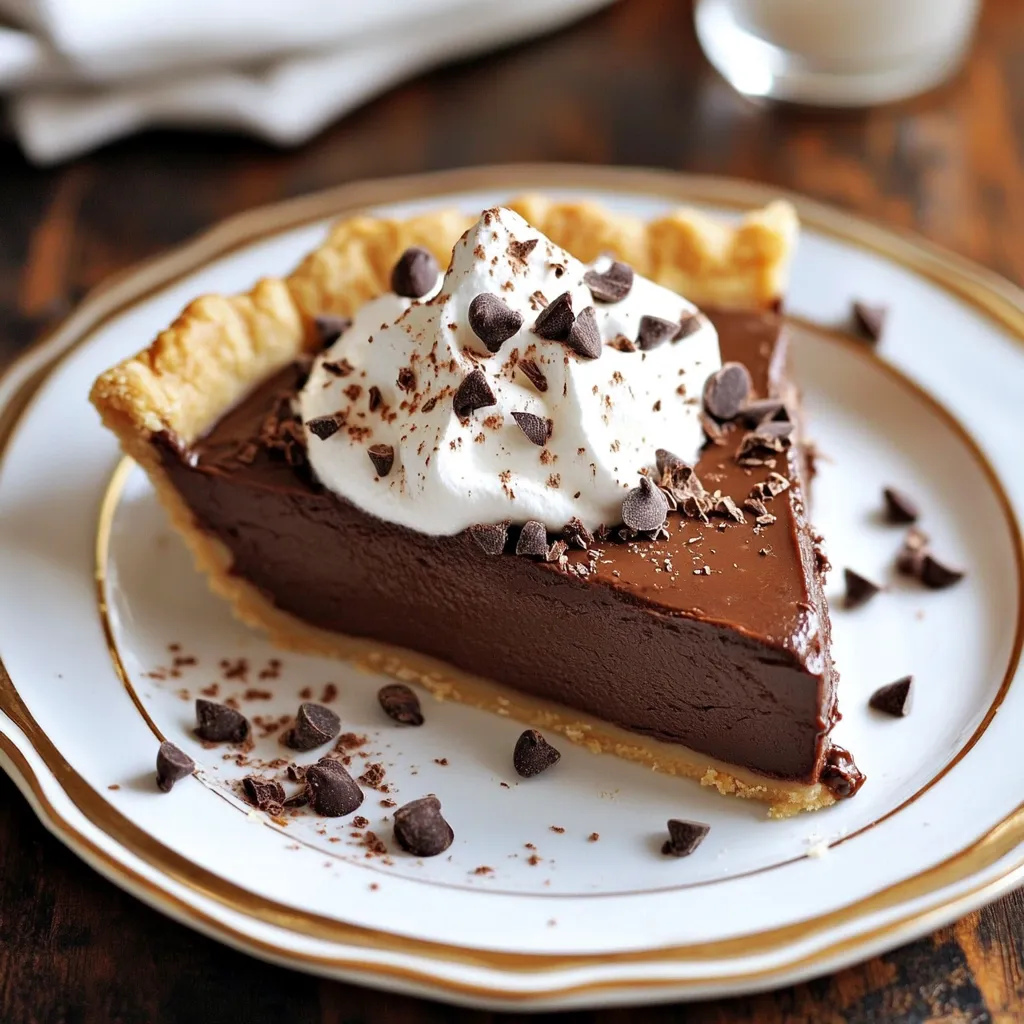
This classic chocolate pie recipe brings back memories of my grandmother's kitchen, with its rich, velvety filling and cloud-like meringue topping. The contrast between the deep chocolate custard and sweet, fluffy meringue creates a dessert that feels both comforting and special.
I first learned to make this pie when I was twelve, standing on a stool next to my grandmother. The moment when the meringue turned golden in the oven was pure magic to me, and I've been recreating that magic for my own family for over twenty years now.
Ingredients
- Butter: Creates a silky texture in the filling and adds richness
- Cocoa powder: Provides deep chocolate flavor without the fuss of melting chocolate
- Egg yolks: Thicken the filling naturally while adding a velvety mouthfeel
- Vanilla extract: Enhances the chocolate flavor with warm aromatic notes
- Cream of tartar: Stabilizes the egg whites ensuring your meringue doesn't weep or collapse
- Pre-baked pie crust: Saves time but homemade is always worth the effort if you have time
 Pin it
Step-by-Step Instructions
- Melt the Butter:
- Heat butter in a medium saucepan over medium heat until completely melted but not browning. The melted butter will form the base of your chocolate filling and helps create that silky texture.
- Create the Chocolate Base:
- Whisk sugar, flour, and cocoa powder in a separate bowl until fully combined with no lumps. This dry mixture is the foundation of your chocolate flavor. Gradually add this to your melted butter, stirring continuously to create a smooth paste. This prevents lumps from forming in your filling.
- Add the Milk:
- Pour milk into the chocolate mixture very slowly while whisking constantly. Start with just a few tablespoons, incorporating completely before adding more. This gradual process prevents lumps and ensures a silky texture. Continue cooking for 5-7 minutes, stirring constantly with a wooden spoon or heat-resistant spatula. The mixture will thicken noticeably when ready.
- Temper the Egg Yolks:
- Whisk egg yolks in a separate bowl until smooth. Add a small spoonful of the hot chocolate mixture to the yolks while whisking vigorously. Continue adding small amounts of the hot mixture until the yolks are warmed. This critical step prevents the eggs from scrambling when added to the hot filling.
- Combine and Finish the Filling:
- Pour the tempered egg mixture back into the chocolate mixture, stirring constantly. Return to low heat and cook for 2-3 minutes until the filling coats the back of a spoon. Add vanilla extract and stir to incorporate. The filling should be thick enough to hold soft peaks when lifted with a spoon.
- Create the Meringue:
- Beat egg whites and cream of tartar with an electric mixer until soft peaks form. The cream of tartar stabilizes the egg whites for a more reliable meringue. Gradually add sugar, one tablespoon at a time, continuing to beat until stiff, glossy peaks form. The meringue should hold its shape firmly when the beater is lifted.
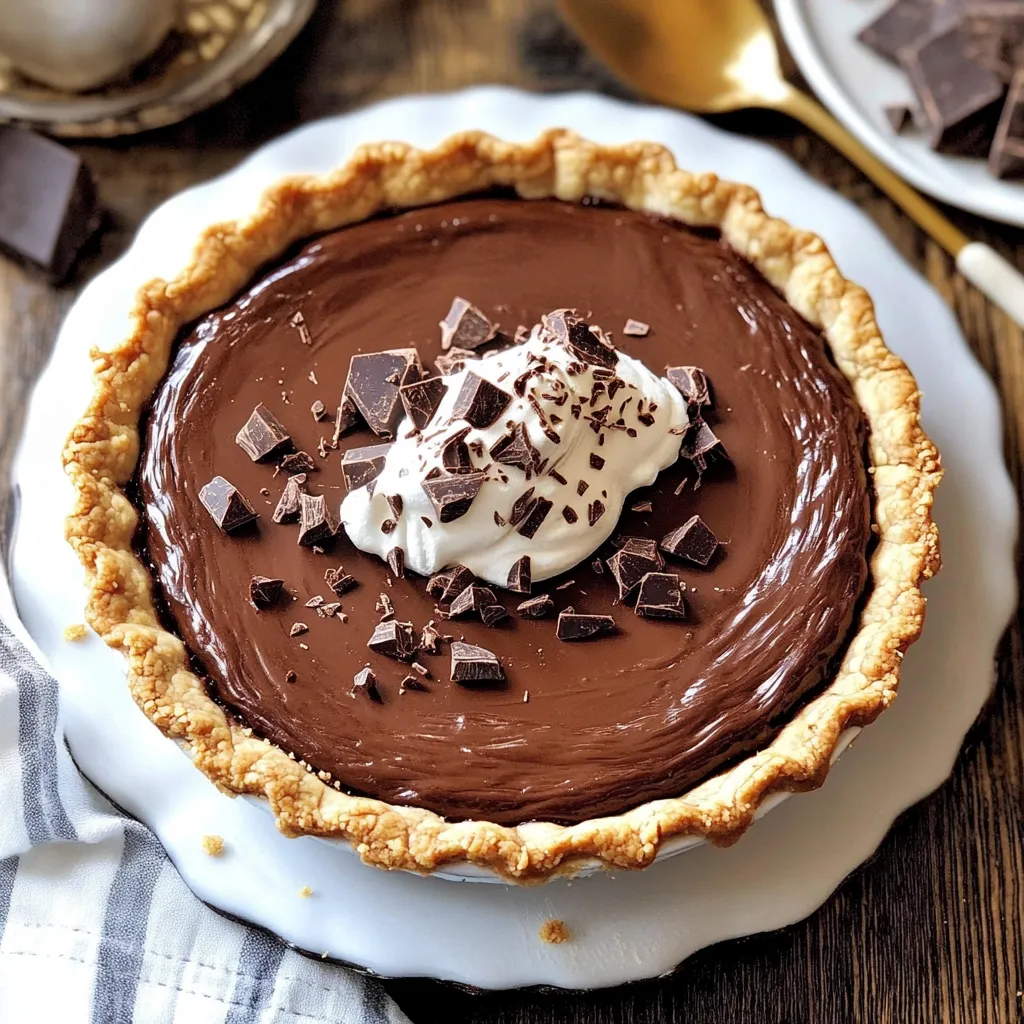
- Assemble and Bake:
- Pour the chocolate filling into your pre-baked pie crust, spreading evenly. While the filling is still warm, dollop the meringue on top, starting at the edges and working inward. Make sure the meringue touches the crust all around to prevent shrinking. Create decorative peaks with the back of a spoon. Bake until the meringue turns golden brown, watching carefully to prevent burning.
My grandmother always said the secret to this pie was being patient with the chocolate filling. She would tell me stories about growing up during the Depression while we stood at the stove stirring that custard for what seemed like hours to my young self. Now I understand that patience truly is the key ingredient.
Storage Tips
After your chocolate pie has completely cooled, cover it loosely with aluminum foil rather than plastic wrap, which can cause the meringue to weep. The pie will keep at room temperature for up to 24 hours. For longer storage, refrigerate for up to 3 days, though the meringue texture will gradually break down over time. This pie does not freeze well due to the meringue topping, which becomes watery when thawed.
Meringue Troubleshooting
Achieving perfect meringue takes practice, but a few key techniques make all the difference. Always use room temperature egg whites for maximum volume. Make sure your mixing bowl is completely clean and free from any grease or fat, which prevents proper whipping. Apply the meringue to the chocolate filling while the filling is still warm to help the meringue adhere and reduce weeping. Lastly, create those beautiful peaks and swirls with the back of a spoon before baking for a professional-looking finish.
 Pin it
Chocolate Variations
The basic recipe creates a nostalgic milk chocolate flavor, but you can easily adjust to your preference. For a deeper, more intense chocolate experience, increase the cocoa powder to ¾ cup. Coffee lovers can add 1 tablespoon of instant espresso powder to the dry ingredients to enhance the chocolate notes without adding coffee flavor. For a Mexican chocolate twist, add ½ teaspoon of cinnamon and a pinch of cayenne pepper to the cocoa mixture.
Frequently Asked Questions
- → How do I prevent the chocolate filling from forming lumps?
To prevent lumps, whisk the dry ingredients thoroughly and gradually stir them into the melted butter. Stir constantly while cooking over medium heat.
- → Why is tempering the egg yolks important?
Tempering prevents the eggs from scrambling by slowly warming them before combining with the hot mixture, ensuring a smooth, rich filling.
- → What type of pie crust works best for this dessert?
A traditional pastry pie crust complements the rich filling, but you can use a graham cracker or cookie crust for added sweetness and texture.
- → How do I know when the meringue is ready to bake?
The meringue is ready when stiff peaks form and it holds its shape when lifted with a spoon or whisk.
- → How can I ensure the meringue doesn’t shrink or separate from the pie?
Spread the meringue over the chocolate filling, ensuring it touches the crust edges, creating a seal. This prevents shrinking and separation.
- → How long should I let the pie cool before serving?
Allow the pie to cool completely, usually 2-3 hours, so the filling sets properly for clean slices.