
 Pin it
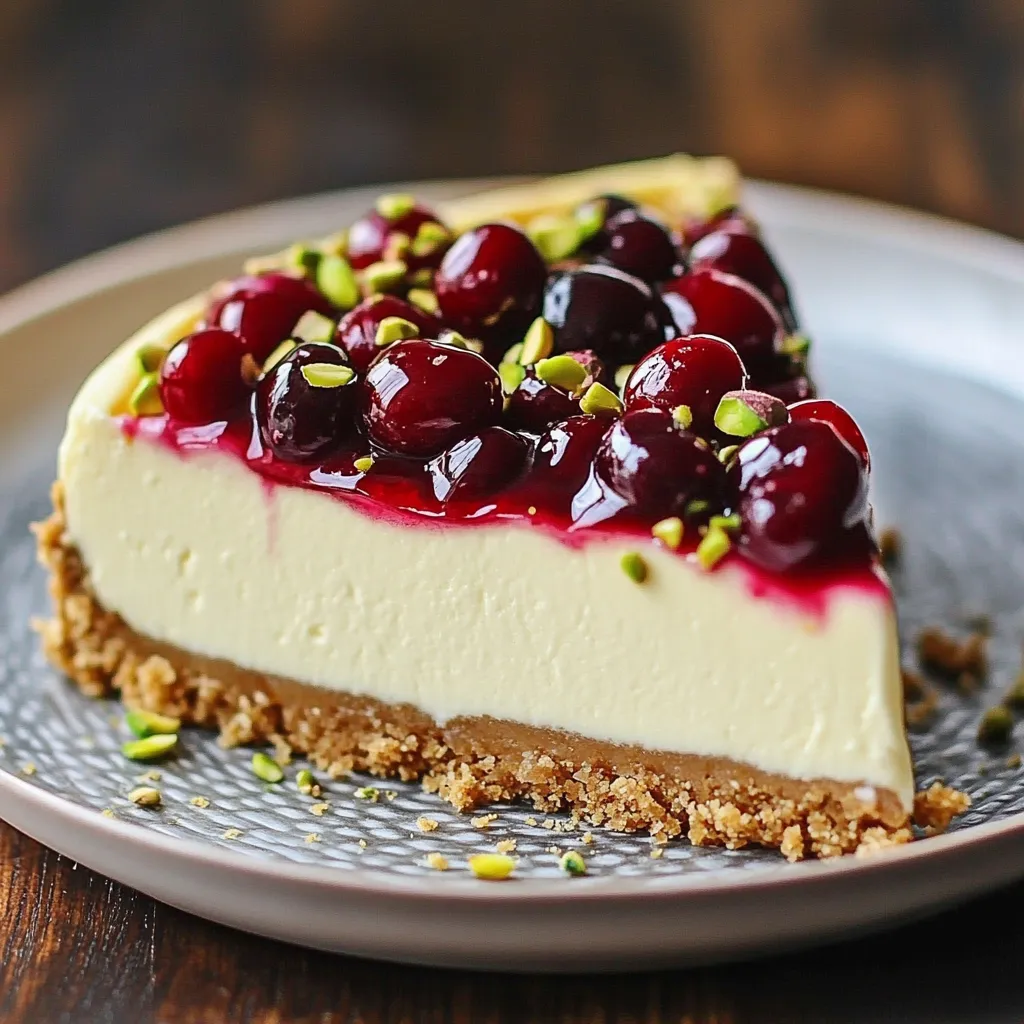
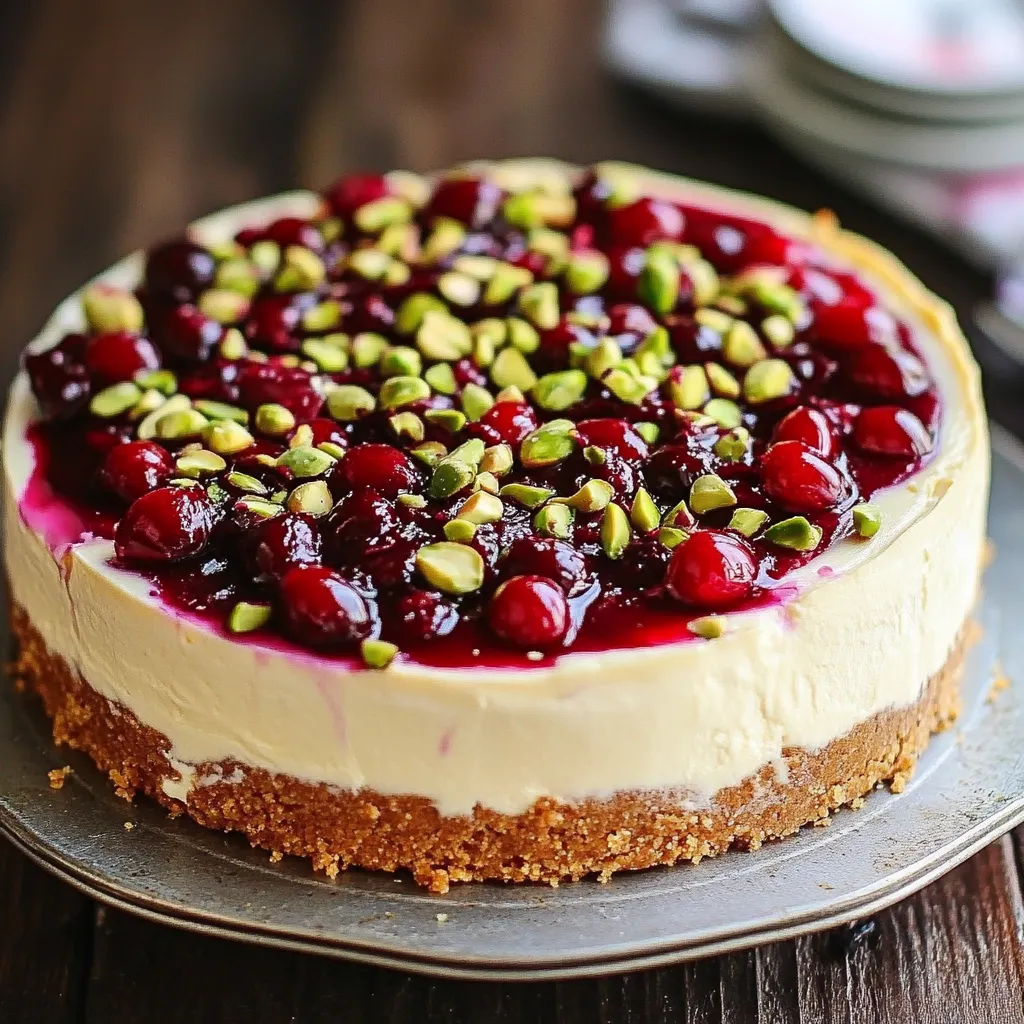
This lemon-lime cherry pistachio cheesecake transforms simple ingredients into a spectacular dessert that balances tartness, sweetness, and nutty flavors in every bite. The vibrant citrus notes complement the rich cherries while the pistachio adds unexpected crunch and color.
I first created this cheesecake for my sister's birthday celebration after she mentioned loving the combination of cherries and pistachios. The entire family was silent during dessert except for occasional sighs of contentment, and now it has become our most requested special occasion treat.
Ingredients
- Graham cracker crumbs: Provide the perfect crunchy foundation with their honey notes that complement both the cherries and pistachios
- Cream cheese: Use full-fat Philadelphia brand for the creamiest texture and most reliable results
- Sour cream: Adds tanginess and creates a smoother texture than cheesecakes made with cream cheese alone
- Fresh lemon and lime juice and zest: Bring brightness that cuts through the richness; look for heavy fruits with thin smooth skins for maximum juice and aromatic oils
- Cherry puree: Made from dark sweet cherries provides natural color and fruity depth
- Pistachios: Select bright green unsalted nuts for best flavor and visual impact
 Pin it
Step-by-Step Instructions
- Preparing the Perfect Crust:
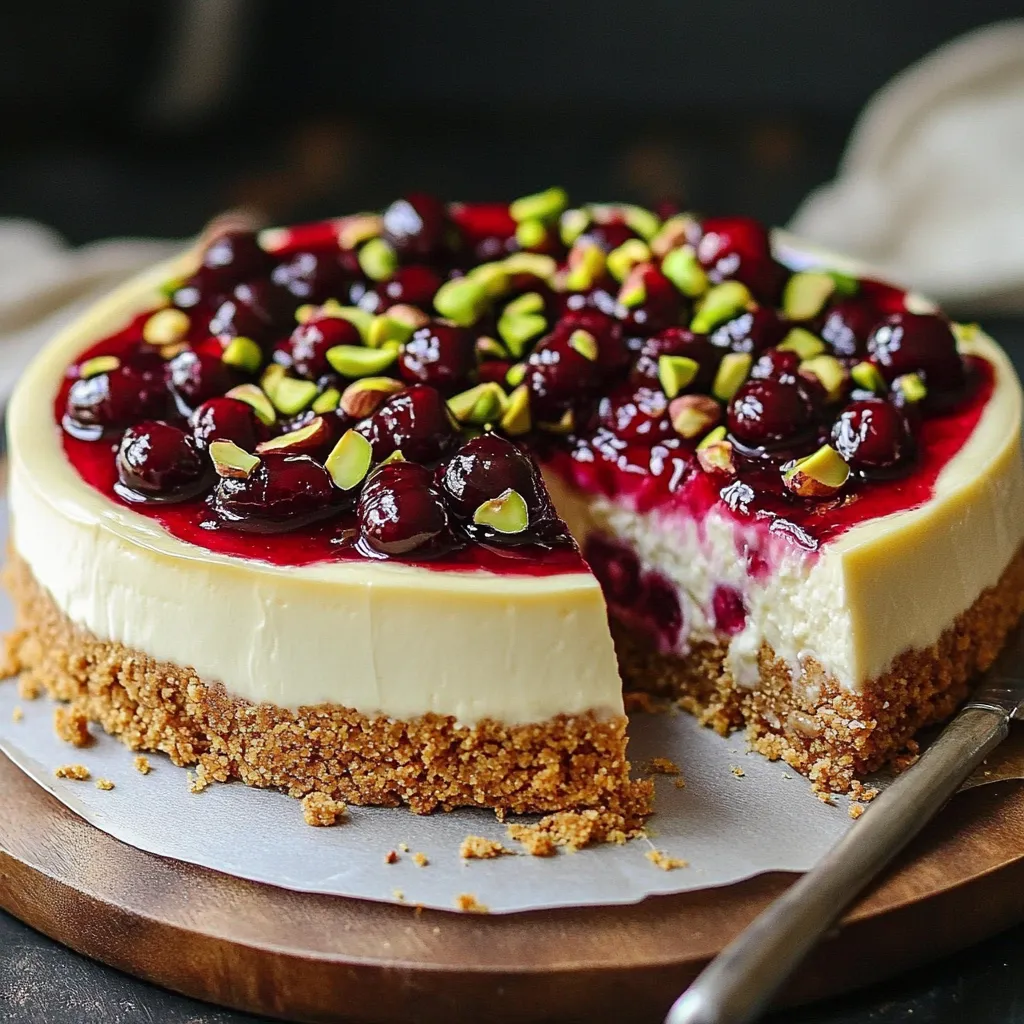
- Process graham crackers until they reach fine sand-like consistency with no large pieces remaining. Mix thoroughly with melted butter until every crumb is moistened for proper binding. Use the flat bottom of a measuring cup to firmly press the mixture into the springform pan creating an even thickness throughout. The pre-baking step ensures the crust stays crisp even under the moist filling.
- Creating Silky Filling:
- Allow cream cheese to sit at room temperature for at least two hours before beginning ensures absolutely smooth texture without lumps. Beat cream cheese and sour cream together for a full three minutes until completely uniform. Incorporate eggs one by one at low speed just until blended overbeating introduces air which causes cracks during baking. Fold in citrus elements with gentle strokes to maintain the airy texture you've developed.
- Perfecting the Bake:
- Position rack in center of oven for even heat distribution. Wrap outside of springform pan with aluminum foil and place on a baking sheet to catch any butter drips. Look for the perfect doneness when edges are set but center still has a slight jiggle like set gelatin. The slow cooling process inside the turned-off oven prevents the dramatic temperature change that causes cracks.
The first time I served this cheesecake at a family gathering my usually reserved father-in-law took one bite and declared it was better than any dessert he'd had in his favorite New York restaurant. That moment convinced me to start developing my own recipes rather than following others.
Preventing Cheesecake Cracks
The most common problem with homemade cheesecakes is surface cracking which occurs when the cake cools too quickly or is overcooked. Always use room temperature ingredients to start. Avoid opening the oven door during baking as temperature fluctuations cause expansion and contraction. The water bath method is not required for this recipe because the sour cream provides enough moisture but if you live in a dry climate consider placing a pan of water on the rack below your cheesecake to create humidity in the oven.
Make-Ahead and Storage Options
This cheesecake actually improves with time as the flavors meld together. Store in the refrigerator covered loosely with foil rather than plastic wrap which can create condensation on the surface. For longer storage freeze individual slices wrapped separately in plastic then foil. Thaw frozen slices in the refrigerator overnight never at room temperature for food safety and texture preservation. The completed cheesecake maintains optimal texture and flavor for up to five days refrigerated.
Seasonal Variations
While this recipe shines with cherries adapt it throughout the year using seasonal fruits. Summer blackberries create dramatic purple marbling. Fall brings opportunities for spiced apple compote topping. Winter citrus season allows for blood orange segments as garnish. Spring strawberries can replace cherries entirely. The pistachio and citrus base remains constant while the fruit elements evolve with what is freshest and most flavorful at the moment.
 Pin it
Serving Suggestions
Allow cheesecake to sit at room temperature for exactly 20 minutes before serving for optimal texture and flavor release. Serve on chilled plates to prevent melting. Accompany with small glasses of cherry liqueur or limoncello for adults or sparkling lemonade for a family-friendly option. A small dollop of unsweetened whipped cream on the side provides textural contrast without competing with the complex flavors already present.
Frequently Asked Questions
- → How do I make the crust firm?
Press the crust mixture firmly into the bottom of the pan and bake for 10-12 minutes. Allow it to cool completely before adding the filling.
- → Can I use frozen cherries for the topping?
Yes, you can use frozen cherries. Let them thaw and drain any excess liquid to prevent the topping from becoming too watery.
- → What’s the purpose of baking in a water bath?
This recipe doesn’t call for a water bath, eliminating the risk of cracks naturally by allowing the cheesecake to cool gradually in the oven.
- → How do I achieve the marbled effect with the cherry puree?
Gently swirl the cherry puree into the filling using a knife or skewer, being careful not to overmix for the best visual contrast.
- → Can I make this dessert ahead of time?
Absolutely! Prepare and refrigerate the cheesecake at least 4 hours or overnight. Add the topping before serving for best results.
- → What other nuts can I use instead of pistachios?
Almonds or walnuts can be used to replace pistachios, though it might slightly alter the flavor profile.
- → What’s the best way to store leftovers?
Store leftover cheesecake in an airtight container in the refrigerator for up to 3-4 days.