
 Pin it
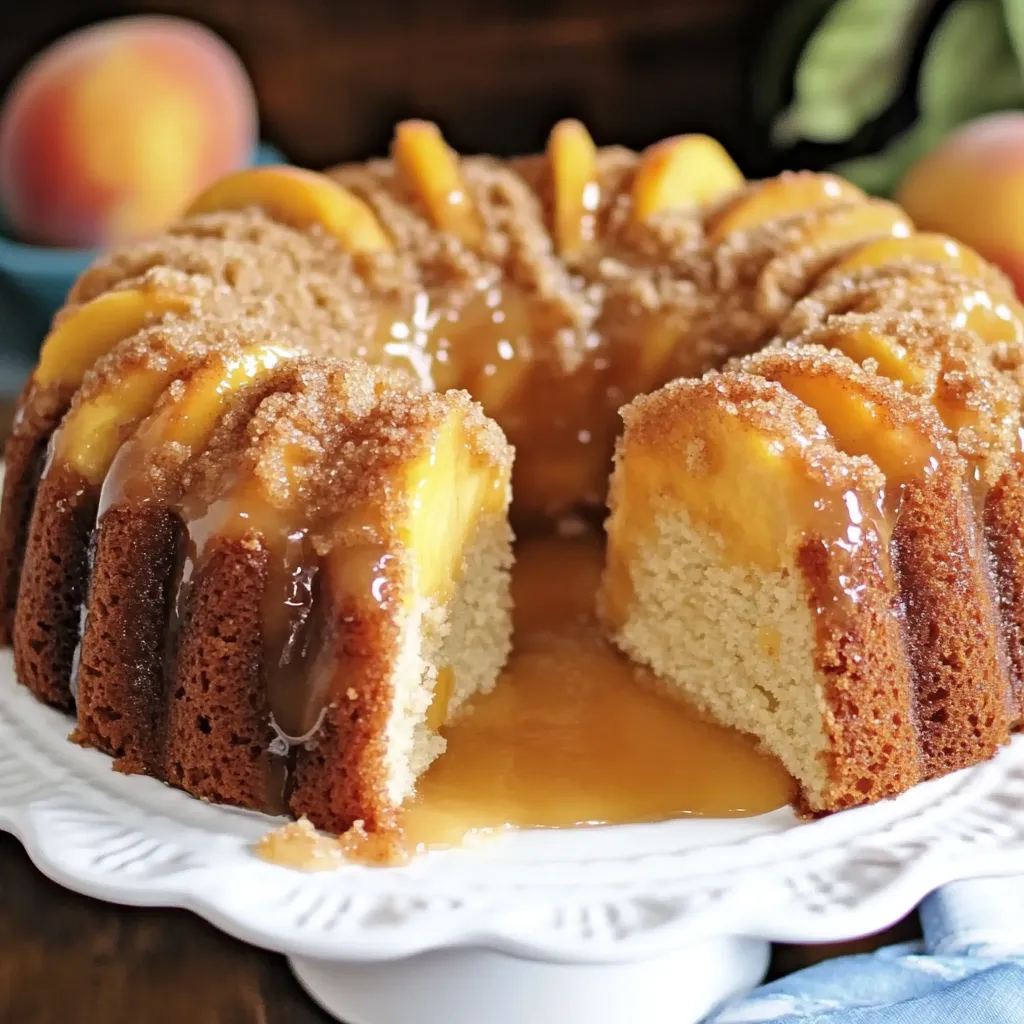
This peach cobbler pound cake transforms two classic desserts into one irresistible treat. The buttery pound cake serves as the perfect canvas for juicy peach filling, while the cinnamon crumb topping adds that cobbler-like crunch everyone loves.
I created this recipe last summer when peaches were overflowing at our farmers market and I couldn't decide between cobbler and cake. My daughter declared it her new birthday request, and honestly, I've made it at least monthly since then.
Ingredients
- All-purpose flour: Forms the foundation of our tender cake and crispy topping. Quality matters here so use unbleached if possible
- Unsalted butter: Creates richness in every layer. Use European style for extra richness
- Fresh peaches: Deliver juicy bursts of summery flavor. Look for fragrant fruit that yields slightly to pressure
- Cinnamon: Adds warmth that complements the peaches perfectly. Ceylon cinnamon offers subtler flavor
- Cornstarch: Thickens the peach filling without making it gummy. Ensures your cake won’t become soggy
- Lemon juice: Brightens the peach flavor and prevents browning. Fresh squeezed makes a noticeable difference
Step-by-Step Instructions
- Preheat and Prep:
- Turn your oven to 350°F and thoroughly grease and flour your pan. This step is crucial for clean removal later. If using fresh peaches, blanch them briefly in boiling water followed by an ice bath to make peeling effortless. The lemon juice bath not only prevents browning but enhances the natural peach flavor.
- Make the Peach Filling:
- Combine your peaches with the sugars, cinnamon, cornstarch and lemon juice in a saucepan over medium heat. Watch carefully as the mixture transforms from loose and watery to thick and glossy. When the peaches soften but still hold their shape, you have achieved perfection. The filling should coat the back of a spoon when ready.
- Prepare the Pound Cake Batter:
- Cream the butter and sugar for a full 3 to 4 minutes until the mixture lightens in both color and texture. This incorporates air which helps your cake rise beautifully. Add eggs one at a time, allowing each to fully incorporate before adding the next. This prevents the batter from breaking and ensures a velvety texture in the finished cake.
- Assemble the Cake:
- Pour half the silky batter into your prepared pan, using an offset spatula to create an even layer. Carefully spoon the cooled peach filling over this base, leaving that critical half-inch border around the edges. This border prevents the filling from touching the pan directly and burning. Add the remaining batter in dollops before gently spreading to fully cover the peaches.
- Make the Crumb Topping:
- Mix your dry ingredients thoroughly before adding the cold butter. Work quickly with your fingertips, lifting and rubbing the mixture to create pea-sized crumbs with some larger pieces for texture. The butter should remain cold throughout this process for the best crumbly result.
- Bake Until Golden:
- Place the pan on the middle rack of your preheated oven. After 45 minutes, tent with foil if the top is browning too quickly. The cake needs time to cook through completely, so be patient and use that toothpick test in multiple spots to ensure doneness. The internal temperature should reach about 200°F when fully baked.
- Serve and Enjoy:
- Allow the cake to cool in the pan for exactly the recommended time before removing. Slice with a serrated knife using a gentle sawing motion to preserve the beautiful layers. Whether served warm or at room temperature, each bite delivers the perfect balance of tender cake, juicy peaches, and crumbly topping.
 Pin it
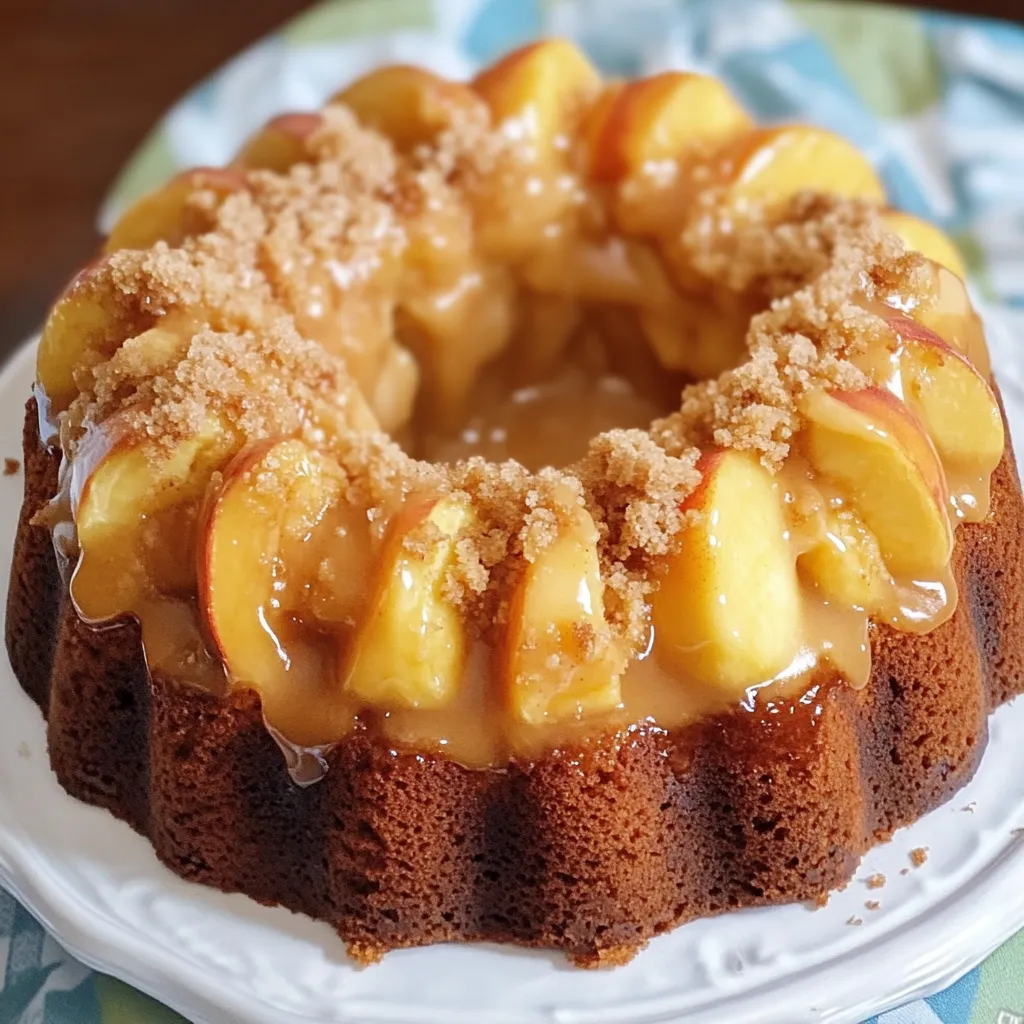
The peach filling truly makes this cake special. I discovered that cooking the peaches before adding them to the batter creates pockets of intense flavor rather than the bland, watery result you get from adding raw fruit directly to cake batter. My grandmother always cooked her fruit fillings this way, and that extra step transforms this from a good cake to an unforgettable one.
Storage Tips
This peach cobbler pound cake maintains its moisture beautifully for several days when stored properly. Keep it at room temperature under a cake dome or wrapped in plastic for up to three days. For longer storage, refrigerate for up to a week, though the crumb topping will soften slightly.
When freezing, I recommend slicing first, then wrapping individual portions in plastic wrap followed by foil. This approach allows you to thaw only what you need. To refresh frozen or refrigerated cake, warm slices in a 300°F oven for about 10 minutes or microwave for 20 seconds until just warm.
Seasonal Variations
While fresh summer peaches create the most vibrant flavor, this versatile recipe adapts beautifully year-round. In fall, substitute diced apples and increase the cinnamon slightly. Winter calls for cranberries with orange zest mixed into the filling. Spring begs for strawberries or rhubarb with a touch more sugar to balance the tartness.
Frozen peaches work wonderfully when fresh aren't available. The key is thawing them completely in a colander to drain excess liquid before cooking. This prevents your filling from becoming too watery and compromising the cake's structure.
Serving For A Crowd
This recipe easily doubles for larger gatherings. When scaling up, bake in a 9×13 baking dish rather than two loaf pans for more even baking. Increase the baking time by about 15 minutes but start checking at the original time.
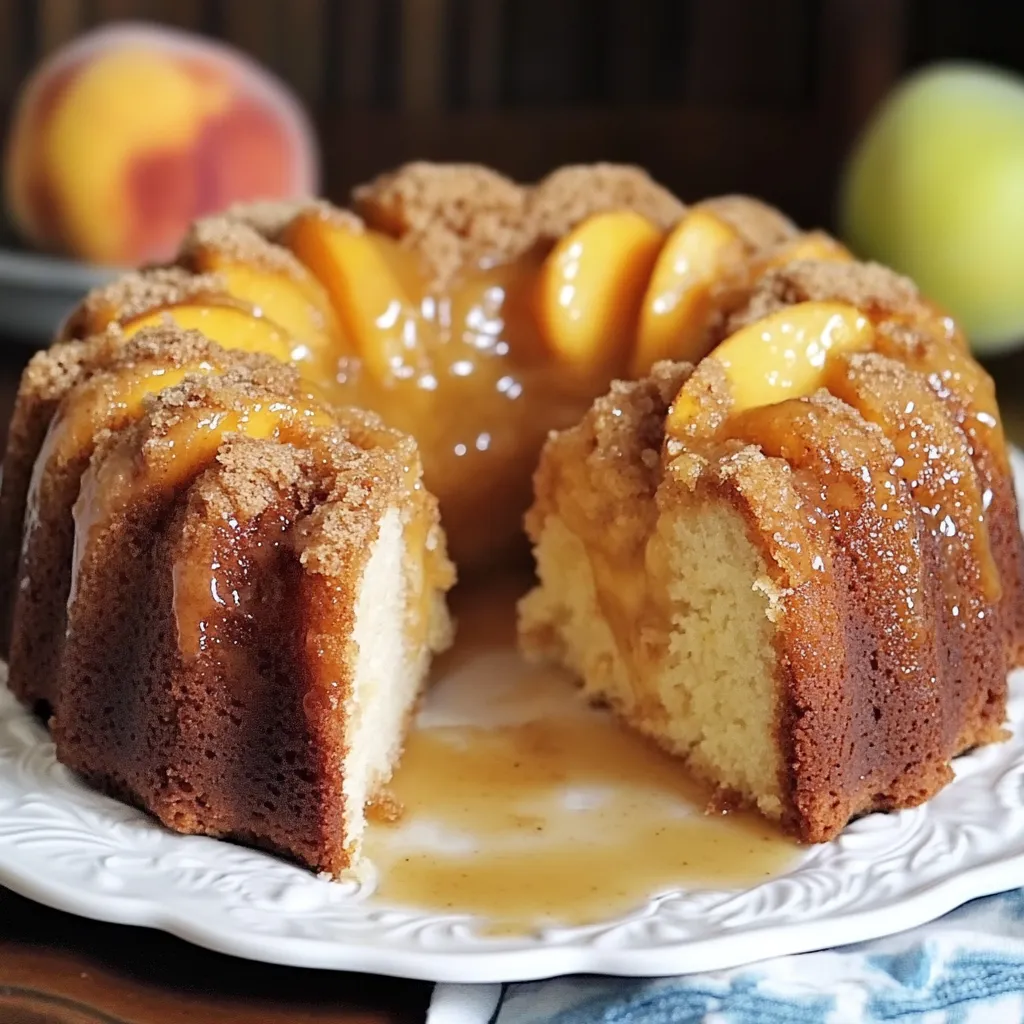
For elegant entertaining, serve thin slices on dessert plates with a drizzle of bourbon caramel sauce and a quenelle of lightly sweetened whipped cream. For casual gatherings, cut into squares and arrange on a platter with fresh peach slices scattered around. The cake also makes a surprisingly delicious breakfast treat served alongside strong coffee.
 Pin it
Frequently Asked Questions
- → Can I use canned peaches instead of fresh?
Yes, canned peaches can be used. Drain them thoroughly and reduce any extra sugar in the filling to prevent it from being overly sweet.
- → How do I keep the crumb topping from sinking?
Ensure the batter is spread evenly in the pan and the crumb topping is gently pressed on the surface before baking.
- → What’s the best way to store leftovers?
Store leftover cake in an airtight container at room temperature for up to 2 days or refrigerate for up to a week. Reheat slices if desired.
- → Can I make this in advance?
Yes, this cake can be made a day ahead. Store it wrapped in plastic wrap and let it sit at room temperature. Add toppings like glaze or cream just before serving.
- → How do I know the cake is done baking?
The cake is done when a toothpick inserted into the center comes out clean or with a few moist crumbs. Avoid overbaking for best results.